Specifications
The DryerJack® is built tough in the USA. Advanced model 477 is deep draw manufactured with heavy gauge Galvalume® steel and designed for low-profile, airflow-efficient performance. The hood’s wide opening, protected by a patented, curved damper, is cleaning tool accessible and handles the demanding needs for properly venting a dryer. This model does come with the attachable Roofnecktm.
- Made of Rugged Heavy Gauge Galvalume® Steel
- Complies With Building Code: IMC 504 & IRC 1502
- Includes Nail Holes for Installation Ease
- Protects with Unibody Hood and Seamless Base
- Available in Three, Heavy Powder-Coated Colors, and "Mill" aka Aluminum finish.

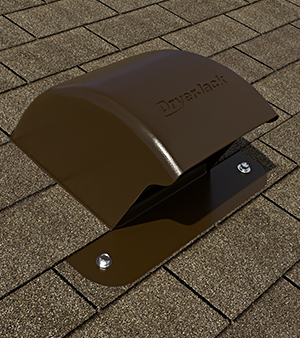 DryerJack Model DJK477 through a Slightly Sloped Roof
Special Requirements
DryerJacks are optimally designed for roof pitch between 3/12 and 12/12. Select Model 486U with an integrated curb cover to deliver maximum weather protection for flat roof installations (less than 3/12 pitched roof). Roof pitch in excess of 45 degrees will render the damper ineffective.
Installation
- Tools Needed
- Tape Measure
- Flat Pry Bar
- Caulk Gun
- Reciprocating Saw
- Battery Powered Drill
- Hammer
- Material Needed
- Leather Gloves
- DryerJack Model - 477
- Silver Foil Tape
- Roofing Cement (1-2 tubes)
- Galvanized Screws or Nails
GENERAL: Before installation, ensure that the substrate (roofing material) is uniform and even. Installation shall be made in accordance with recognized sheet metal practices. SMACNA Architectural Sheet Metal Manual 6th Ed. Specifications shall be used as a guide and basis for detail whenever applicable.
NOTE: Recommended use of this product is for exhaust of warm dry or slightly moist air only. This product is not intended for venting exhaust grease or liquid.
DryerJack Installation
The DryerJack 477 is designed specifically for venting the dryer through the roof. For optimal results, install the DryerJack with the versatile RoofNeck collar.
Professional installation is recommended.
Step 1: Start by determining the location to install the roof vent.
Step 2: Using the included template, drill a pilot hole on the “X” to mark the center of the hole location for ductwork.
Step 3: Trace around the perimeter of the template.
Step 4: From the pilot hole mark, cut a four and one quarter inch circular hole into roof deck for the ductwork.
Step 5: If installing the RoofNeck collar, begin at Step 3 in those instructions and complete the RoofNeck installation.
Step 6: Cut the roof covering along the traced line and remove.
Step 7: Apply roofing sealant along the underside of the flange.
Step 8: Slide the flange underneath the shingles.
Step 9: Using the predrilled holes, secure to the roof deck with corrosion resistant nails or screws.
Step 10: Apply roofing sealant to the underside of the shingles and lay over the flange.
Step 11: Finish the installation by applying roofing sealant around the base of the hood and exposed fasteners.
The DryerJack is now ready for use.
Roof Vent Advantages
-
Airflow Efficiency
Superior airflow efficiency is achieved thanks to the combination of a unique curved damper and larger vent opening.
Allowing the dryer to perform at peak efficiency helps reduce lint buildup (and the resulting fire hazard), and it keeps dryer times low which can reduce wear and tear and saves energy.
-
Maintenance Access
Dryer exhaust systems need to be cleaned—from beginning to end—regularly. The DryerJack® includes special design features for ready access that is easy on cleaning tools. The ability to clean vents from both ends can be a major advantage for longer runs, and it is helpful for a thorough cleaning.
-
Protection
Bird, rodent and rain protection:
Your natural intuition might insist that a screen exists to shield bird and rodent entry, but the building code clearly prohibits their use in dryer venting as they quickly get contaminated with lint. Special attention to the shape, position and how the damper rests inside the hood when closed, delivers a high degree of intrusion prevention without the use of screens. A seamless hood helps prevent water intrusion in the exhaust duct. -
Quality Construction
Tough as nails construction, the 477 is deep drawn right here in the US, and ensures a very long duty life. The tightly engineered housing, flange, damper and collar are all constructed of heavy gauge Galvalume®.
The DryerJack hood features balance aesthetic objectives with application requirements. Rounded flange corners simplify handling, and built-in nail holes help speed installation.
Model DJK477
Low Profile Model in White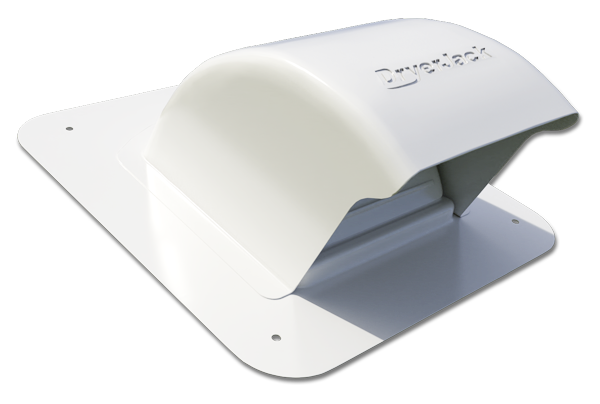
Performance Matters
Typical roof terminations have been proven to restrict airflow to a dangerous level when it comes to venting dryers. Poorly designed roof vents are more than just an eye sore; they are rarely duct cleaning accessible or pest resistant.
The DryerJack delivers advanced performance for improved safety, efficiency and duty life.
A Better Roof Termination
DryerJacks are the first roof vents designed to meet the more stringent venting requirements of dryer exhaust systems.
Considering that back pressure higher than .6 WCI is generally recognized as inefficient, you can see that venting through the roof with non-dryer specific vents is immediately problematic. The less back pressure is created by the roof vent, the more efficiently the system performs.
The new DryerJack is the most efficient. The position and curvature of the damper, combined with hood size, optimize airflow to such a degree that laboratory tests confirm only the most marginal reduction in airflow. Terminating the shorter duct run with a DryerJack helps venting through the roof deliver on the promise this shorter route offers.
At less than 5 1/2" above the roof plane, it is also low-profile for minimal visibility. For medium snowfall zones and / or higher profile roof tiles, select the larger model 486 which is as efficient but taller.